Friday, February 22, 2013

FOREST CARE

At the Ontario cottage a few years ago we had an arborist come to take down a few trees.  When he said something along the lines of "If you were managing your forest..."  
Ouch. That stung.  
What did he mean if I was "managing" my forest? I love my forest.  The opportunity to steward a natural woodland property is amazing to me, and I wanted to do everything I should be doing to keep it healthy and happy.

So I researched that winter. 
Much of what I found was designed to teach one how to optimize large acreage for commercial harvesting, but may of the same principles applied to the 100' x 100' forest I have on the other side of our road.  Most cottages on the lake do not think of their property on the other side of the road, away from the lake, as part of their cottage.  But we sure do.  In the spring when cold air blows off the lake and sitting at the water's edge is a chilly proposition we simply go into the woods where it is sheltered and relax in the sun on boulders enjoying the chipmunks company.

It may seem strange to the infrequent person walking their dog down the road to see us perched up there but we love it.

The forest did not look like a forest; it had a lot of scrub and looked, well, like scrub. "Are there even any trees in there?" you might ask.
 It turns out there are.

I feel now like I actually have a proper forest.  It is amazing to be able to see back into the woods.
To know that it is healthier for the remaining trees to have less competition for sun and nutrients makes me feel really good about what I am doing.  

In year one, in the spring before the bugs and leaves came out - both of which make it substantially harder to do later in the season - I took to cutting back the smallest scrubby trees. I started with just my hand shears and a pair of loppers.  Small trees were gathered up and tossed further back into the remaining scrub to keep the floor 'tidy', after all I need to be able to walk around up there!
Thinned to the right of the creek but not the left
In year two I took down anything I could with a hand saw.  Good healthy work. 
I sheared the tall spindly trees of their thin limbs and stacked them neatly in piles which will be brought down to the fire pit next year after after they have had time to dry out. 

I also continued the dry creek bed we had made beside the cottage on the other side of the road. Why not? We certainly had enough stone...


I did not cut down every small tree. When a sapling was not crowded by its neighbours it was welcome to stay.  Nor did I call in a professional to help me identify different trees, which many of the articles I read recommended.  To be frank pretty much all of them really were the same.

Before
After
At the end of the summer last year I took up the chain saw because there are a few too close to one another that were simply too big to cut by hand.  Not many, but a few.  I did not quite get through them all, but I think you will agree the difference is substantial.

Helping the forest and embracing our property away from the lake - two admirable goals.  Pretty flowers are lovely but this work is something that I am particularly proud of and find the results to beautiful in their own way.

Do you have a soft spot for forests as well?

***
Sharing with Fertilizer Fridays

Saturday, February 16, 2013

DIRECT SOWING - new to me

Between my small Toronto gardens and my large but treed woodland cottage garden, the idea of starting from seeds rather than purchasing plants never appealed to me. The idea of having shelves and lights inside and having to harden plants before getting them outside seems like more work than I will have time for, until I retire.


Now I have massive (for me) weed-free (for now)  garden beds just begging to be planted. So I have begun researching what perennials I can direct sow here in zone 3. 
Here is what I have found so far:
Foxglove is something I have always wanted to grow. I planted it once at the cottage with no success which I attribute to not enough light and so I tried again last year but we moved at the end of July and so I do not know how they finished up the year.  I will not deadhead them and hope that they spread like crazy!

Poppies are another plant that I have always wanted to grow but never had the right conditions. This excellent article on poppy growing gives me hope that I should be able to direct sow with success.  I would have liked Himalayan Blue Poppies but apparently they prefer cool summers. I will try Oriental and California poppies instead.


Sunflower, Fantasia Mix Hybrid
Sunflowers, another plant I have not had enough sun to grow and am eager to try. There are so many gorgeous varieties, including lots with tints of red which I will go for to keep things a little bit different and interesting.  I will experiment with varying heights since they come in sizes from 2' to 12' or more!


Cherry Brandy rudbeckia seeds - Garden Seeds - Annual Flower Seeds
Rudbeckia on the other hand I have grown before, having transplanted hundreds from the roadside at the Ontario cottage. With that said I will be trying out new varieties like "Cherry Brandy" (above) and "Autumn Colours" (below).  
Autumn Colors rudbeckia seeds- Garden Seeds - Annual Flower Seeds
They should be sown at around 14 degrees Celsius and I will probably plant them near the poppies so they fill the gaps the poppies leave behind later in the season.

Scabiosa are on my list and should also flower in their first year. Most often in shades of bluey/purpley, I just found this red variety I might try as well.

Echinacea is a must have though I do not expect them to bloom in the first year. Luckily I already bought "Hot Lava" and "Secret Desire" last year to get me off to a blooming start next year.

I am sure there are more (e.g. flax!), but I will have to leave them for another day.

FRENEMIES - and so it begins

I wondered previously at what point the rabbits in my yard would switch from happy little friends to hungry little enemies.  I imagined I had at least until Spring.

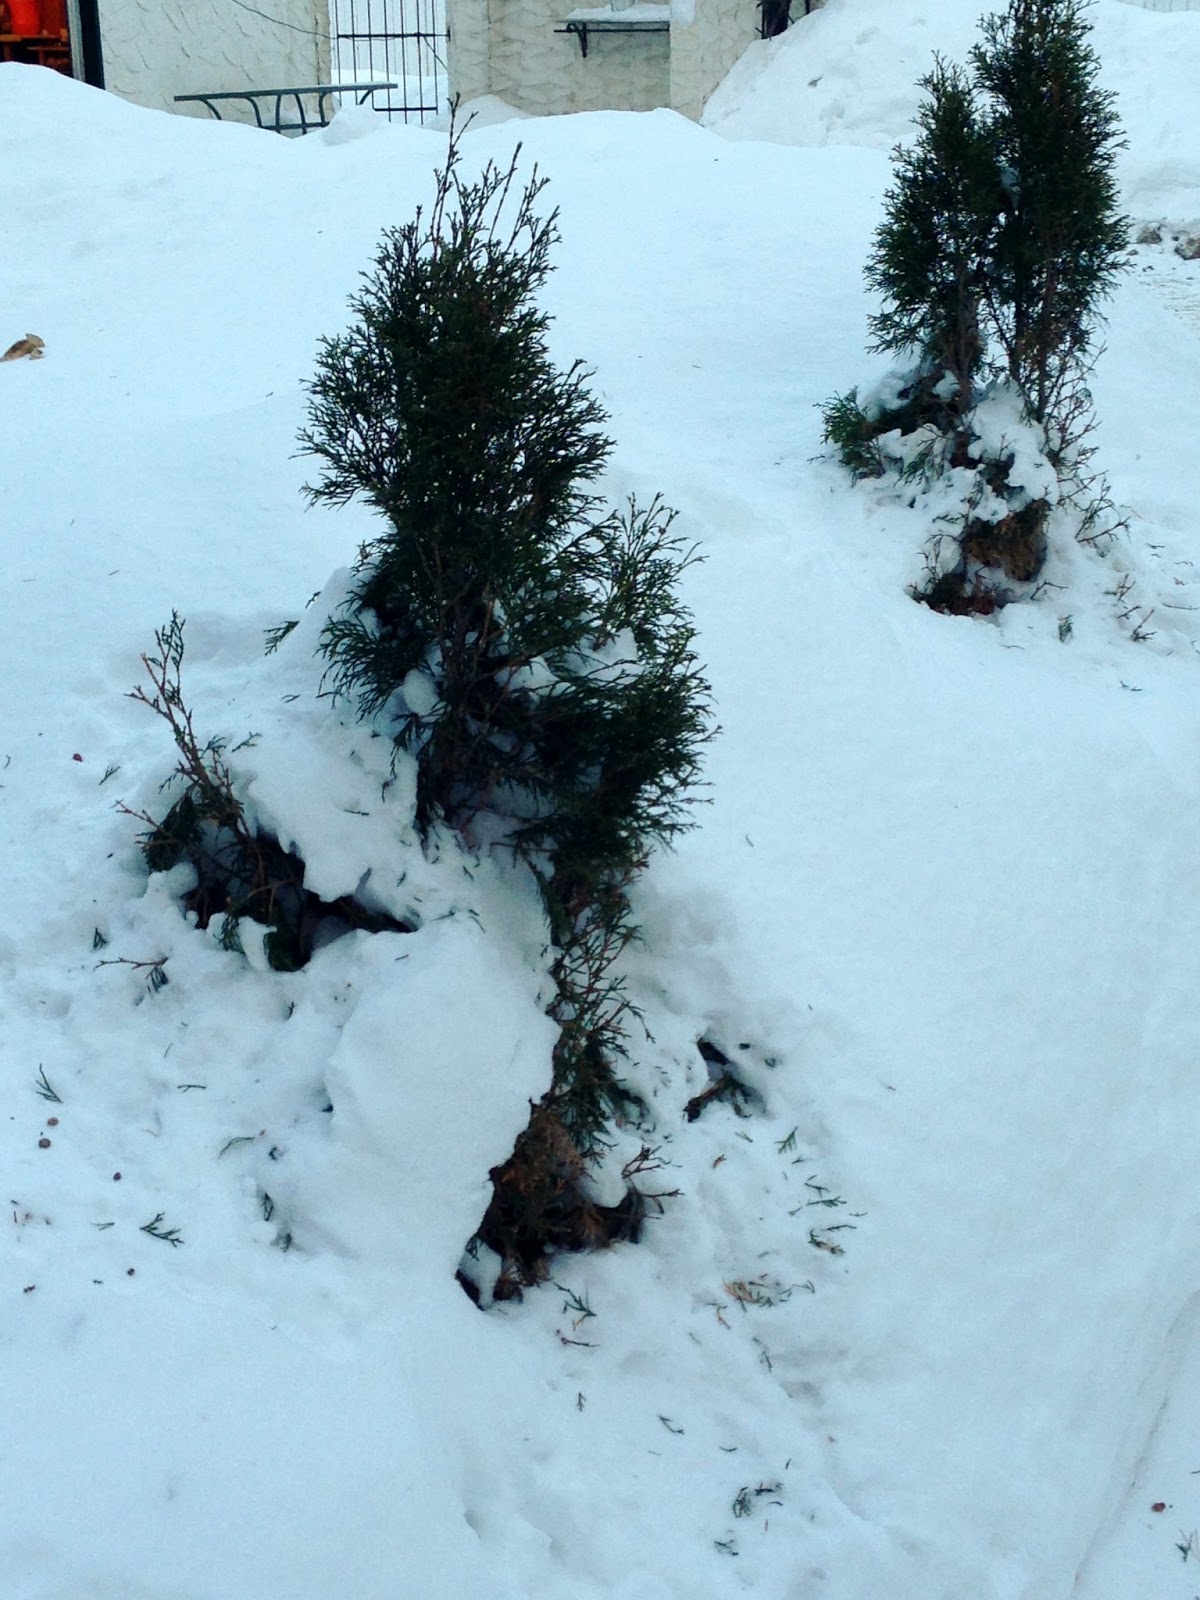
However I have noticed that they have been having their way with a couple of Cedars. 

Funny since it does not seem to have happened before, but this has been a snowier winter than the past few and they say that the warmer winters are part of the reason why there are more bunnies. So they may be as hungry as they have even been in their short lives.

The rabbits have been jumping up the snowbank and nibbling on the Cedars half way up. 

Come spring it may look as if I attempted to trim them into some forced shape, which is totally not my style, at all.  Apparently now I have 'co-designers' helping out.

And so it begins.

***

Wednesday, February 13, 2013

TAKING MY CUE

The space between our laneway and our driveway is a great example of my goal to make the cottage feel exceptionally green and alive but not necessarily feel like a garden at all.  

It is also a great example of taking my cue from the existing space.
The goal: make the top like the bottom for a seamless green view from here to the bench at top centre

When we moved in, 'Periwinkle Hill' (above) already existed, Lily of the Valley, Daffodils and all.  What a great view from the bedrooms!  A green standout in the middle of the brown forest floor.  

The space above the driveway on the other hand was just regular forest floor, all leaves and branches.

I started by thinning the trees.  Those under the electrical wires went first, followed by those that were 'twinned' or clearly too crowded.  Then I swept out all the leaves, dead branches and twigs and proceeded to transplant hundreds and hundreds of Periwinkle plugs.

A tip on transplanting Periwinkle (and I assume other mat-forming ground covers): take from the edges of your clump where they just pop right out of the ground vs. the middle where they need to be wrestled out on all sides.
Day after day, summer after summer, I took Periwinkle from where it had been spreading into the driveway and moved it up the hill.  

In the  fall I added 2-3 types of Daffodils with various blooming times and Wood Ferns from the forest. When possible I planted some poking up between rocks (above) because it makes it look like they were there first.

I also transplanted Lily-of-the-Valley from down the hill to up the hill. I was careful to get it on both sides of fallen logs (above)  to convey the idea that it had been there for years. The patch is a carefully planned vertical zigzag that is meant to look random as if it had been slowly making its way downward for years.

I started in the middle of the hill until it was appropriately dense and then worked my way outward with the Periwinkle, rather than making the whole hill lightly covered. I wanted to have impact relatively fast and the way to do it is to concentrate effort.  It is frequently a debate I have with myself when tackling a large area: fill the entire designated area lightly or concentrate in one area and then spread outwards?  

Eventually though (after hundreds and hundreds of transplants) I became satisfied that within a few years this area would be as I envisaged it (just like Periwinkle Hill) and allowed myself to move on and tackle other areas.  I do not really know how fast Periwinkle grows so it will be an interesting experiment to see how quickly we can get that top part looking as luxurious and green as the hill below and merge it all into one big garden - that we just happen to park in the middle of.

***

Monday, February 11, 2013

MACRO MONDAY - Solomon's Seal

Solomon's Seal is not only attractive for its discreet white bells, the foliage is also very attractive.
Do you agree?

***
Sharing with Macro Monday & I Heart Macro

Saturday, February 09, 2013

PERIWINKLE HILL

Spring 2010
I think the design of this part of the cottage is absolutely brilliant. 

I can not take credit for it however, the Periwinkle already cascaded down the slope with both Lily-of-the-Valley and Daffodil present.  Original daffs are right in the centre above and the others I added in year two when we planted a bushel across the property.

Spring 2012
However I have made some upgrades:

  • transplanted Periwinkle in bare patches
  • brought in moss for the rocks
  • removed some small trees (from under the electrical wires)
  • planted a couple of white Bleeding Hearts
  • added additional ferns
  • removed daylilies from the base of the steps that were not getting enough sun to bloom 
  • cleared out some drift wood 
  • added lots more Daffodils, Kedron blooming above right was a huge success
  • brought in yard art
  • planted 180 Giant Crocus about a dozen of which were missed by hungry Chipmunk's 
  • widened the path substantially, the Periwinkle had grown half way across the path!. Who knew there was actually a rock border to it?

Spring 2012

But the basic concept was already here. 

A true garden to readers of this blog, and perhaps not noticeably a garden at all for those people who prefer theirs have well defined borders. 

TUXEDO PLANS - front garden

In a previous post I spoke about using the seasons to shape my thinking around colours in my new gardens. With reds, yellows and oranges in summer and cooler blues and purples in spring.  Instead I have decided to have all-season colour-grouped gardens.   

In front of the house I will have purples and blues together. ("What about some yellows for contrast?" you may be asking. Not unless I find it lacking, but I am going to try it alone first.)  I already have Allium, Iris and plenty of Crocus planted out front to welcome in the spring.

I am going to focus first and foremost on my new lasagna garden since I want to wait and see what comes up  in the existing gardens (aside from some tall Asiatic lilies of unknown colour and some low growing Lamium you can see below).
What I want to have at the back of the new garden (i.e. the original garden) need to be tall so I am considering:
  • Lilies - Purple Prince Tree Lily from Breck's will look great right beside the steps for close inspection. They say these can get over 200 cm tall. I have my fingers crossed. 
  • Delphinium -  in varying shades of purple and blue (heavy on the blue) right in front of the windows with tall (4-5') at the very back and then some shorter ones (3') in front. I have no trouble dedicating extra space to these beauties.
  • Phlox - Continuing right, towards the tall mystery shrub in need of a trim, 60-90cm tall blue (and purple?) with shorter Phlox in front a creeping Phlox along the boarder with the sidewalk.
Revising down my wishlist from a previous, messy post about seeds I want to just purple and blue flowers provides this list:

  • Catananche (Cupid's Dart) 'Caerulea' - This tall (75 cm) plant can be sown direct which moves it up my list. Perhaps mixed in with other, smaller purple Asiatic lilies immediately beside the doorstep. 
  • Iris - A variety of all kinds for an extended blooming period. Perhaps I will be able to get some more at the spring plant sale now that I have a place for them, a big place in front of the Delphiniums in the centre of the garden.
  • Echinops (Globe Thistle) - I am not sure how I feel about this one yet. 
  • Ipomea 'Hazlewood Blues' - I am thinking of adding them to the shrub covering part of the front window.
  • Lobelia 'Queen Victoria' - These 3 foot plants will be very different from the trailing annual I think of when I think  'lobelia' now. I will have to research more to see if they can survive here, paperer in front of the Iris.
  • Perennial Geranium 'Buxton Blue' - running along the front at the sidewalk
  • Primula 'Noverna Deep Blue' - I need to check on this more since the catalogue says in blooms 'summer into fall' but I thought they bloomed exclusively in the spring. In any case there are plenty of purple Primula, including drumstick.  I need to research further.
  • Prunella ' Freelander Blue' - Close second. I will hold off this year since sites agree they are zone 4 and I ahve not seen them 'live' before which is always risky...
  • Veronica (Speedwell) - Catalogue says zone 4, but web says "Royal Candles" is zone 3. This could make for a big patch from seed right where the long narrow part opens to the larger rounder part

It is a pretty big space to fill, even without the existing gardens to consider. So it is still a work-in-progress, but I am feel I am getting closer

It is beginning to look like this (though very much a work-in-progress):
Lilies (tall and short) and Cupid's Dart
Delphinium (tall and shot)
Phlox (tall and short)
Iris (German and Dutch)
Veronica Speedwell
Bachelor's Buttons
Globe Primula & Campanula
Creeping Phlox
Primula & Hardy Geranium
Blue Himalayan Poppies

Oh, and Muscari and Flax everywhere.

Friday, February 08, 2013

COTTAGE GARDEN - 40 year plan

What is the big plan for the Ontario cottage?  Is there one?
You bet.

Just because I am now in Winnipeg does not mean I have stopped thinking about my beloved Cottage Garden. My ultimate goal for the Cottage Garden is simple: get as much blooming as possible everywhere possible for as long as possible.  That of course means keeping with my habit of plucking up local roadside "weeds" and wildflowers of course, including Oxeye daisies, Black-Eyed-Susans, Ferns, Jack-in-the-Pulpit, Columbine, Trillium, Viper's Bugloss, Buttercups and more!

Lakefront Garden
 I started with the Oxeye daisies on the Lakefront Garden, Septic Garden and  North Deck Garden. I have a good amount in all of those places but can easily see myself adding more each year.

I will also add Black-Eyed-Susans to the Lakefront Garden, they are sure to do well there in the sun.  Last year I added them to the Septic Garden and the North Deck Garden where a few of them are coming back.  Two years ago I transplanted them and had to return to the city right away, so they struggled whereas last year I added a lot to North Deck Garden and was able to stay and water them for a couple of weeks and they did much better and should easily return next year.  Hurrah!

And of course the SunDrops are doing well everywhere... The Lakefront Garden is their priority since they are doing so well there, and they they are a great height to mix and mingle with the Wood Ferns in the South Deck Garden. In fact there should be enough for the North Deck Garden as well.

I am currently grouping Violets in the North Fern Garden, but with a 40 year plan I will eventually have enough there and then add them beside the gravel path with the Trillium I planted last year.
In the foreground about 200 Red Trillium line this path , along with Periwinkle and later ferns & white Impatiens.
And of course I will continue to simply bring more and more (and more!) plant material from the surrounding forest - ferns of all kinds in particular.  Not just lining the path, but throughout the property.  Why look at a brown forest floor when you can green it up?

My goal is to have the cottage feel like it is a tropical rainforest on Vancouver Island. Like it is on steroids.
Greener and more alive than it has a right to be naturally, though naturally beautiful.

***
Sharing with Fertilizer Friday

Monday, February 04, 2013

PLANNING IN PROGRESS

I am in the midst of planning my new front garden and while I know next to nothing about growing plants from seeds, the mere possibility of directly sowing into my new, large, empty and fertile beds has me almost giddy with possibility. 

This essentially removes the price barrier from design.
The trade off? A smaller selection to chose from, but included are a surprising number of the plants I was already planning on using like Echinacea, Rudbeckia, Foxglove , Flax and Lupin.

So much to learn.  
Who says winters are too long? I feel like I will need the whole time to learn and plan.  I am going to have to start using an Excel document to keep track of everything.

Sunday, February 03, 2013

INSPIRATION - address rock

I am becoming better and better and using the camera on my phone to take snaps of gardens and landscapes that inspire me as I come across them.  And I am finally getting around to sharing some of them.

It is hard to see the our address from the street and it would be helpful for Chinese food delivery men if we had it closer to the actual street. 

Given I like a natural look I would like a great big rock with our address on it.  More or less like this one.
I have not priced it yet, but I recognize that they seem only to be on the biggest properties.  
Perhaps it is not price that dictates that though? Perhaps they are just the ones with enough space.

A man can dream.

Saturday, February 02, 2013

BULB PLANTING - Tuxedo

When I planted my bulbs last fall I mapped out exactly where I put them including exact type and number per grouping...where the map is today however is anyone's guess.

Lesson learned: post it on the blog right away or risk losing it.

With that said I can still document roughly where I planted  just not the exact names and numbers, so hopefully in the spring it will be obvious and I can give an update


North Side Garden
            
Approx 80 white daffodils, 4 different types in 5 clusters, both early and mid bloomers:

  • Wisely, early bloomer, over sized yellow cup, 16"
  • Professor Einstein, early bloomer, orange cup, 12"
  • Marjorie Hein, mid bloomer, orange trimmed yellow-throated cup, 18"
  • Barrett Browning, mid bloomer, orange cup, 16"


North front window garden

  • 22 Allium for late Spring blooms 
  • 80 mixed Giant Crocus for early Spring colour. 
Get all the details in this earlier post.


Under front spruce
    
  • 160 Giant Crocus running North-South in a line under the tree (rather than in a circle to contrast with the curvature of the garden).  Remembrance and Pickwick in alternating colour blocks.  
  • 50 early-blooming Iris reticulada, closer to the front path amongst the pieces of the old broken-up concrete sidewalk.

Street tree
40 Giant Crocus around the base of the tree to the right; I want neighbours to be able to enjoy the display as well and I want them to welcome us as we pull into the driveway.

Street shrubs
     

  • 25 Red Devon, mid bloomer, yellow with orange cup,  16"
  • 25 Orange Progress, early bloomer, yellow with orange cup, 16"


Under back Spruce
50 daffodils in amongst the Bishop's Weed. Shorter in front, taller in back.

  • 25 Jetfire, early bloomer, yellow with orange cup, 10"
  • 25 Pimpernel, mid bloomer, yellow with orange cup, 18" 

***
Sharing with Fertilizer Friday

Tuesday, January 29, 2013

BIRDFEEDER BATTLE

I should stop calling my feeders "bird feeders".  
They are equal parts squirrel and rabbit feeders.

Squirrels eat bulbs and tip the feeders so I do not love that they dine on my dime.
Bunnies are cute and they just hang out below the feeders, so I do not mind, but check in with me in the spring when tender new shoots will make a delicious bunny buffett and see how I feel about them then.

In an effort to make the feeders less accessible to the squirrels I removed a lot of the lower dead branches close to the feeders.  I am probably kidding myself that it is the solution since squirrels can launch themselves through the air a fair distance, but I could not come home to a spilled feeder one more time with our trying something.

Despite having lots of trees I do not have too many places for feeders, so they are both on the same tall spruce in the backyard at the moment.

Good exercise and to be honest perhaps I am proving a point that gardening does not have to stop because of the cold weather.

New and improved?
While I hope to have put a dent in the squirrels' use, the bunnies do not care how inaccessible the feeders are.  This little guy was back grazing the next day. 
The remaining lower branches are scraggly with some greenery that I have been using for my urns and centerpieces but come a warmer day they too will come down leaving it a little tidier and less shady under this tree

***
Sharing with Nature Notes

RUN BUNNY RUN


Saturday, January 26, 2013

WILT - Positioning, positioning, positioning

The purpose of learning is growth, and our minds, unlike our bodies, can continue growing as we continue to live. 
~Mortimer Adler

I have had to learn over and over to pay attention to exactly how a transplant is sitting in its new home before I bury it, step back and appraise   Often I am so caught up in the transplanting process, especially when adding things to the forest floor where digging a hole is hard work, that I just want to get it done and move on to the next.

But making sure you have positioned the plant properly can make a huge difference.   
In a previous post I shared my goal with this space, to make a triangular fern garden leading the eye up to the big rock in back.  When filling in the gap above I first placed the ferns facing away from the path.

Oops, it did not really serve its purpose of filling in the gap when facing away.

I then quickly jumped back in and turned it around.  What a difference!

 Heck, I like my neighbours but I did not plant this fern for their benefit, it really needed to be facing me.  Of course it seems obvious but the real trick is thinking of that when you are in the trenches, so to speak.

***
Sharing with Fertilizer Friday

What I Learned Today (WILT) is a recurring series of posts about those thing I tend to learn over and over, and seem destined to keep repeating.  The basics.  
The simple things that are not so simple.

Making a record of the error of my ways is designed to help me to kick the habit.

Time will tell.