Showing posts with label moss. Show all posts

Saturday, May 11, 2013

RAKE IT BABY, RAKE IT - a visit to the ontario cottage

Last weekend my husband and I, both on business trips to different cities, were able to meet at our cottage in Ontario for an unexpected weekend with friends.  

Big property and only a few days - where to start?
With a rake.

Part of the magic of Periwinkle Hill is that for most people it does not look like a garden, it just "is".  But of course us gardeners know that if I did not rake the Periwinkle it would eventually suffocate. Horrors!
Next week the Periwinkle will bloom and then of course the Kedron daffodils will follow the Trumpets, the ferns will unfurl and on the season will progress.

Tip: keep a bud vase with you when raking through daffodils. Some always snap, even under my tender touch with the rake, and into the vase they go, ready to spread their spring cheer inside.


And the dry creek bed?
Right where we left it.  
Raking the moss border of the creek is even more delicate work than raking Periwinkle.  

And while we are on the topic of raking stones, this shot makes it clear that it is worth it although at first it may seem excessive.
Do you not agree the raked stones really add something?

I put a fair amount of work into lining the sides of the gravel path with moss, Jack-in-the-Pulpit, Red Trillium by the hundred and ferns by the dozen.
Without a good raking all but the pushiest Trillium are hidden.

Raking Trillium is the most delicate work of all because breaking off even a single leaf can cut the life of the early blooming spring beauties short.  
After a few hours the connection between the path, creek bed and Periwinkle is once more clear.

***
Sharing with Fertilizer Friday

Wednesday, April 24, 2013

THE ORIGINAL LASAGNA GARDEN

 While I have already written a few posts about my two new lasagna garden beds here in Winnipeg, I actually tried my first lasagna garden at the Ontario cottage last summer.  It was much smaller and I did not research it as thoroughly, meaning I hope the plants come back but I will not be surprised if I have to redo it. 

I rushed it and it may not have enough newspapers, is likely not deep enough and without layers of green and brown material.  But you have to start somewhere; live and learn.                                                                  


The white really pops between the taller Bugloss & trees as backdrop and the slightly smaller greens in front. The Yellow Loosestrife are in great contrast to the more numerous and more subtle blue Bugloss.
(When all of these are done blooming the daylilies take over.)

I wanted to extend the Lakefront Garden back to the Old Broken Tree. What use is that particular strip of grass in one of the sunnier locations I had (city or lake)? I love greens but I wanted more colour.
Step one, lay down newspaper. 
In hindsight probably not as thick as I should have laid it.

Steps 2 and 3, soil and plants. A proper lasagna garden would have alternating layers that would compost and help to break up the grass underneath, here I just have some paper and soil. 
In went Daisies and Chicory from the side of the road . Here they are being stored in water in the paddleboat until they are ready to be planted. Keeping their roots in water is very important, when there are so many to plant it can be a while before they are back in the ground. 
It was still missing some 'oomph' and some height so I brought in the Viper's Bugloss, which due to its long taproot was a poor choice to put into this rather shallow bed, but there you have it, one could almost say the same for the Chicory.
In the short term it looked amazing, then quite a bit of it died back, after all I was transplanting them in full bloom into a too-shallow bed. I got carried away.

I am thinking about finding a place for this trifecta in my new front yard garden: Viper's Bugloss, Chicory and Daisies. 
Beautiful.

Previous lasagna garden posts

Tuesday, April 16, 2013

DRY CREEK BED - part 2 of 2


In part one I described the process of adding a lovely dry creek bed beside the main path at our Ontario cottage.  I loved the organic process I went through. No mapping out the full vision in advance, instead seeing incremental changes that could make it better when I had time to work on it.

Once the heavy lifting was done I got to "dress" it. The stones are the bones but there was much more to be done to really highlight and take full advantage my efforts.

May 2012
  • First I removed the wood ferns that were on a hump between the Periwinkle and the creek so they would not block the view
  • Then I added Ostrich Ferns along the far border to highlight define the creek. The ferns were  harvested from the side of the road
  • Then I added moss. 2 massive 'buttons' of beautiful, lush green moss that I harvested from the side of the road
  • I am adding small ferns and Astilbe. Not sure if the ferns are young or just small, time will tell. And not sure how the Astilbe will do here, but it is less dry than where they struggled before, and if they do well I think they will fit in and look natural even though they do not grow naturally here. 
July 2012
  • I also added Sundrops to the moss buttons. I hope they do not grow too big there since the reason I moved the ferns out in the first place was so they did not block the view. It is nice to have some colour though, that yellow really pops amidst the greens.
  • And finally I have started to add a moss border beneath the 'canopy' of the ferns to define the edge of the creek bed even further.

So while it will mean raking the rocks and moss border each year to keep it clear of leaves I am very happy with the final result.  Or perhaps I should say the result-to-date because you never know what I may think of adding next!

Part 1 of 2
***
Sharing with Foliage Follow Up, Nature Notes, 
Outdoor Wednesday, Rurality Blog Hop & Fertilizer Friday

Tuesday, December 11, 2012

MACRO MONDAY - moss part 2

I absolutely love old moss covered stumps and transplanted many from the forest onto my property this fall.

***

Sharing with Macro Monday

Monday, December 03, 2012

Tuesday, October 09, 2012

YARD ART - The Shady Lady

We bought the Shady Lady a few years back at a going out of business sale at a garden centre - a good bargain since statuary can be expensive.

In Toronto we had her in the far back corner, so one really had to be out seated at the table to see her in all her glory.

The brown spots at her neck and near her hand are from a failed attempt at encouraging moss to cover her using a beer slurry.
But I have not given up yet.  
Once we find her a home in Tuxedo I will be back at it and try again, this time covering her with plastic and keeping her warm and damp indoors while the initial moss takes root.

While she will lose some of the finer details I definitely want to see her covered from head to toe
in fuzzy green.  Well, maybe I will leave her eyes uncovered so she can see...

***

Friday, August 17, 2012

SOUTH FERN GARDEN

Along the south side of the cottage, beside the pea gravel path, is a space I am turning into a fern garden.  There is a place on the side deck here that gets later afternoon sun after the rest of the property is in shade, and when you sit there, you look out onto - you guessed it, my fern garden.

The green chairs in the background above is the place to capture late afternoon sun.

And this shot that I took at dusk, towards the end of May, is what you look out on.
The ferns in the foreground are ones that I planted in previous years to form a border and so have had time to adjust and are fuller and more robust.  Ferns in the back have been added more recently and will need time to fill out.

I added about 8 new ferns this summer to flesh out my plans - collected from roadside ditches as usual.  Digging holes in the forest floor is serious business, whew!

I am aiming generally for a triangular shape to draw the eye up to some large rocks in the background.
Why look out on dry brown leaves when the space could be green instead?


I was pretty good at watering the ferns every day after I planted them, but we had 30+ temperatures so it was tough on the transplants.  I will be anxious to see how they come back next year.
***

Sharing with:
  

Saturday, August 11, 2012

THE DEVIL IS IN THE DETAILS - Baby Fern

The idiom "the devil is in the detail" refers to a catch or mysterious element hidden in the details and is meant to convey that details are important.
Many a designer would agree, whether gardener, architect, engineer or artist.

While I suppose it was important to a degree in the beds of my Cabbagetown Garden, it was definitely more-so in the woods of the Cottage Garden.
The goal for most of my woodland garden is to exaggerate the natural forest, with more ferns and moss and natural bloomers than one would expect - if one even thinks about it.  I would happily forgive any guests who did not think that the space around the driveway was a garden since there are no garden beds, and thought that it 'just happened to be lush'.
In the pic above there are two good examples of how I love to accent my woodland garden.  

I have placed moss on a number of the rocks in the garden, including the one on the right, near the top of the pea-gravel path.  Rather than making a slurry I have simply placed the moss on the rock.  It did not work every time, but where it has worked well I have first put damp earth and then some dead leaves under the moss, so this has meant finding a spot in the rock with a slight depression.
The fern in the crotch of the trees used to live in anonymity in the woods near the cottage and now has a place of honour right beside path where it will be appreciated by passerby.

With time it should grown enough to hide the plugs from the white lights we have running up the trees to illuminate the path at night.  
(Don't worry, since this photo was taken the plug has been covered in electrical tape!)

'The Devil is in the Details' will be a repeating theme of this blog, I hope you enjoyed the first one.
*** 
Sharing with:


Thursday, July 05, 2012

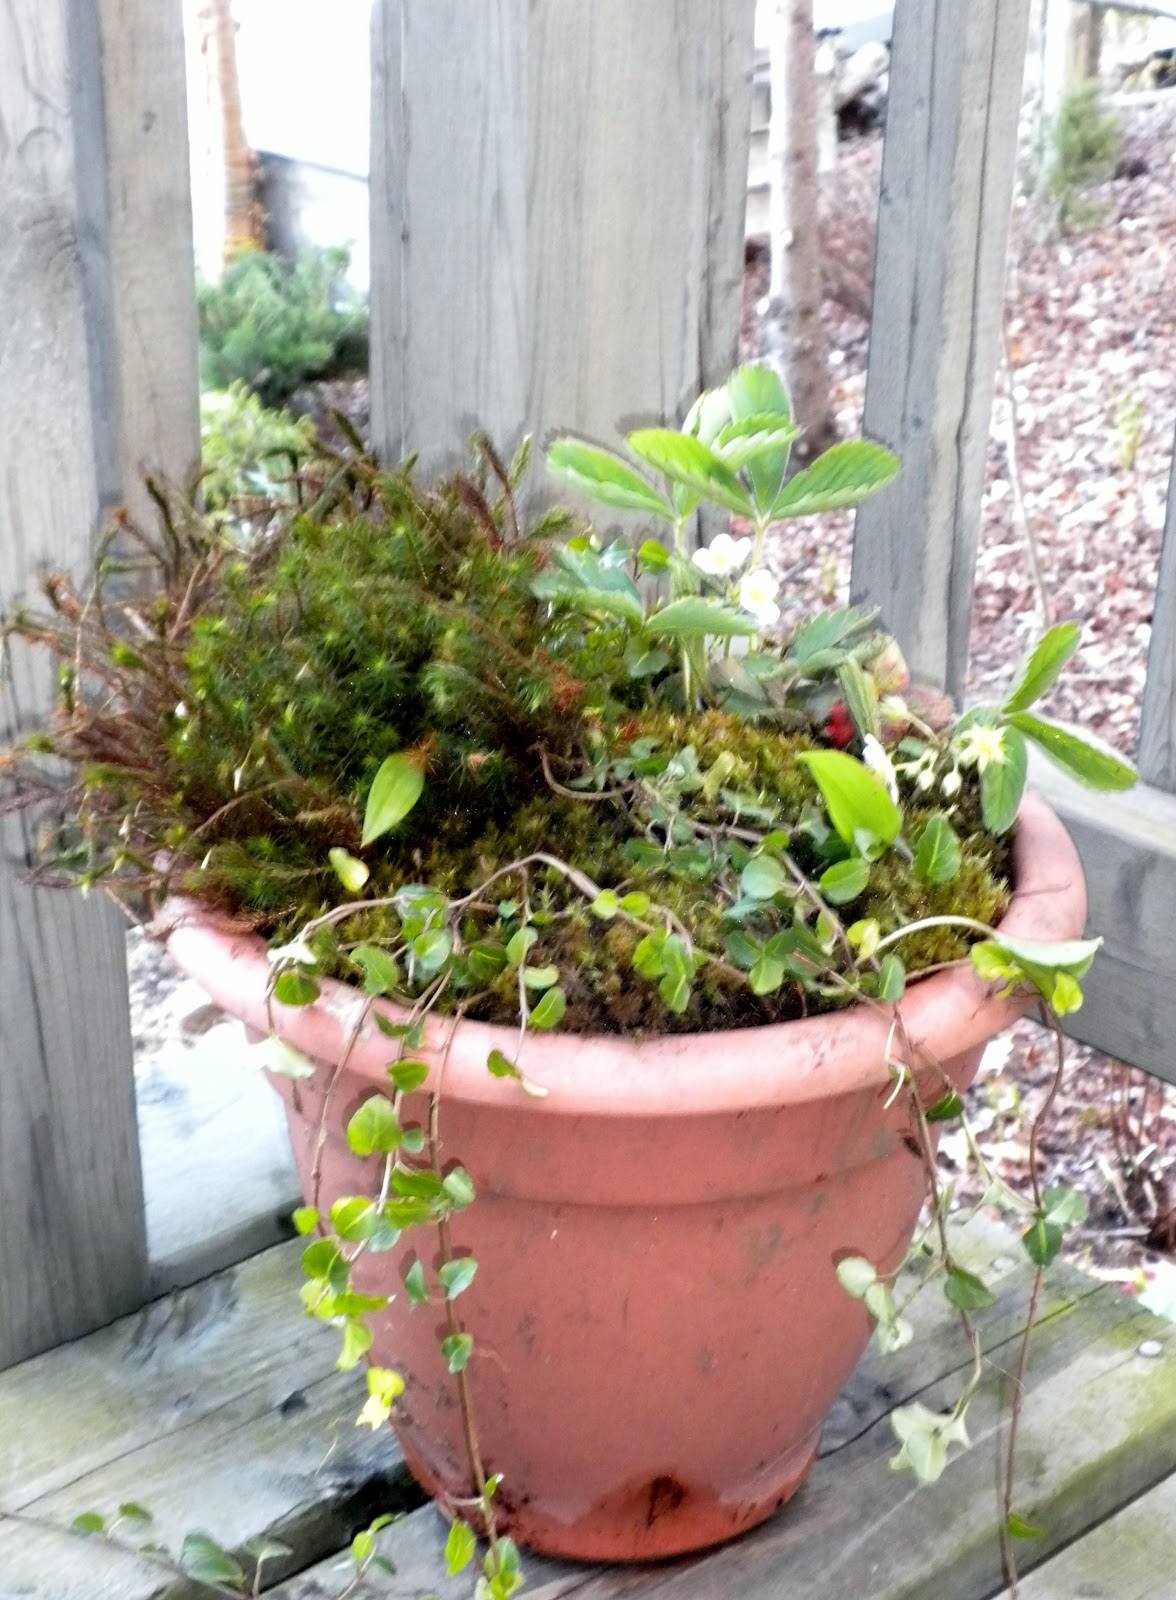
WILD STRAWBERRY PLANTERS

Okay, so only one wild strawberry planter this year, but definitely more next year. 

What I have done that is thrifty is to use natural plants from the woods to fill my planters.  The only bought plant for these woodland beauties are the white Impatiens, which at 4/$1 fit with a thrifty theme I'd say.  If you've got a sunny spot for planters then you have so many options, but if like me you're surrounded by trees Impatiens are some of the only shade loving annuals and certainly the least expensive.

July
June
The Wild Strawberry has a nice white flower in the spring (it's there, can you see it?) and I suppose I just might get some fruit though I have not seen any yet.  Otherwise the planter has lots of moss and the Impatien (yes, that is just from one plug).

The unexpected treat I got from the strawberry are the trailing bits you see in the shot above.  Not that noticeable but very nice - that strawberry has big plans!

Here are some of the other planters I've got going.  The Impatiens were so healthy I had to remove some and put them in the garden because they were covering all of the beautiful mosses!
Ferns, Jack-in-thePulpit, Solomon's Seal, moss, Trillium and other things I don't know the name of were all for then taking in our back woods.

I am sharing this with DIY Thrifty Thursday and Frugal Friday.

Thursday, June 21, 2012

GARDENS FOR SALE

We have decided to move to Winnipeg, a Zone 3, so I'll have to investigate this list of recommended zone 3 plants, at first glance I see a lot of familiar friends since I'm already in Zone 4 at the cottage.  We are keeping the cottage though, just love it too much to abandon, so the journey here is not over.

It also means I'll need to figure out how to change the name of my blog to something less attached to the location of my gardens, after all gardening is a passion I'll take with me wherever I go.

This means I'll need to prioritize some of the projects I've got half completed.  Focus and prioritization in the garden has always been a struggle.  I know from both a time management and a design perspective it can be a good idea to focus on one project and complete it before staring another, but I tend to get distracted by ideas.

For now I will prioritize the larger structural things I want to do, and focus less on the maintenance.  You know, ensure the 'bones' are in place.
  • flagstone path to the lake - tedious to dig out all the grass between the ground covers, but I better hop to it!

  • Getting in a moss border to defend against the grass on the Lakefront Garden.  This is a doozy in terms of workload; I guess I better hop to it. 

Any thoughts on if this is a losing battle before I begin in earnest? Will I need to add in a plastic barrier to really keep the grass out? I don't like the look of them in this natural setting, but perhaps if I grow the moss over top of the edge...

  • Extending the  lakefront garden to incorporate the space up to the old tree.  Better to do it now before the lilies are in bloom.
Yes, it is just some tall grass now, but soon it will be more daylilies (and possibly some daises, and...)

Odds are that I will not be able to just focus on these big projects, but if I can at least prioritize them for the next while...

{March 2014 update: Success!  I extended the Lakefront Garden to the old tree, and replaced the grass with ground cover in the flagstone path. I am a bit iffy on how far I got with the moss border though...}